Ozobot Bit
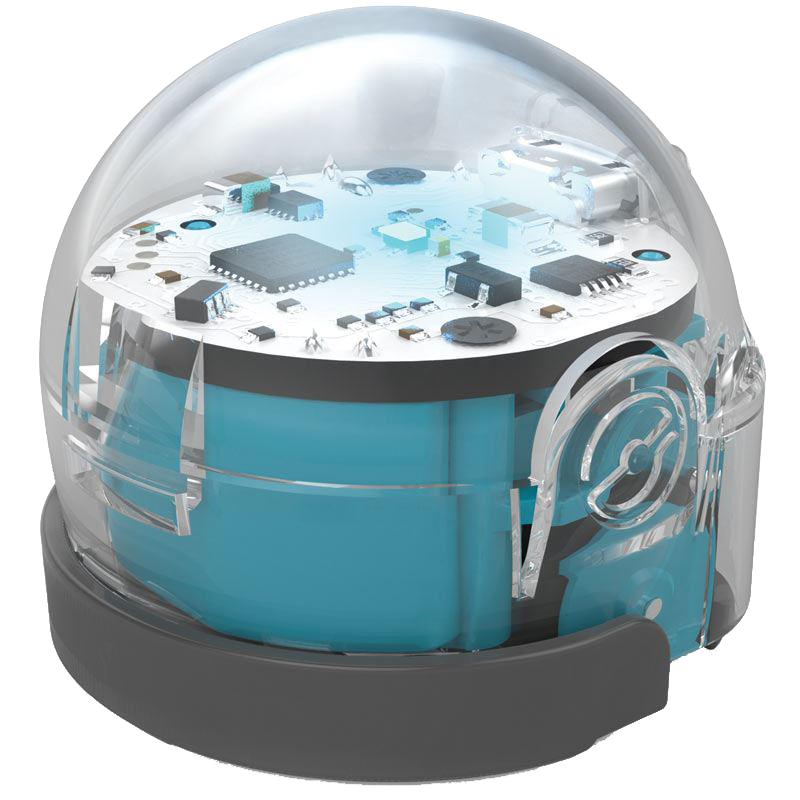
What is an Ozobot? It’s a small programmable robot:
It features a light sensor, a pulsating multicolor LED and two tiny motors that drive a pair of wheels, allowing it to move forward, turn and reverse.
The ozobot has two distinct ways of being used: a “line following” mode where it can follow lines drawn on a tablet or paper (suitable for grades 1-4) and a programmable mode whereby it can be programmed using a graphical programming application similar to Scratch to perform a series of movements and change the color of its LED (suitable for grades 3-6) .
Setup
Charging
Before using the Ozobot for the first time make sure it is charged. It uses a standard micro USB connector and when plugged in will emit a green pulsing light when almost charged and glow a constant green when fully charged.
During normal use the Ozobot usually glows blue. If it starts to flash red then it probably needs charging.
Calibration
The first time the Ozobot is used (and if it stops following lines), it may need to be calibrated. To calibrate the Ozobot press and hold the power button on its side for about two seconds until it starts flashing white and then place it in the center of the calibration dot (which can be found on the tip sheet or you can create one by drawing a black dot the size of the Ozobot). The Ozobot will move out of the dot, stop and blink green if it has successfully calibrated. If it blinks red just repeat the steps above.
Line Following Mode
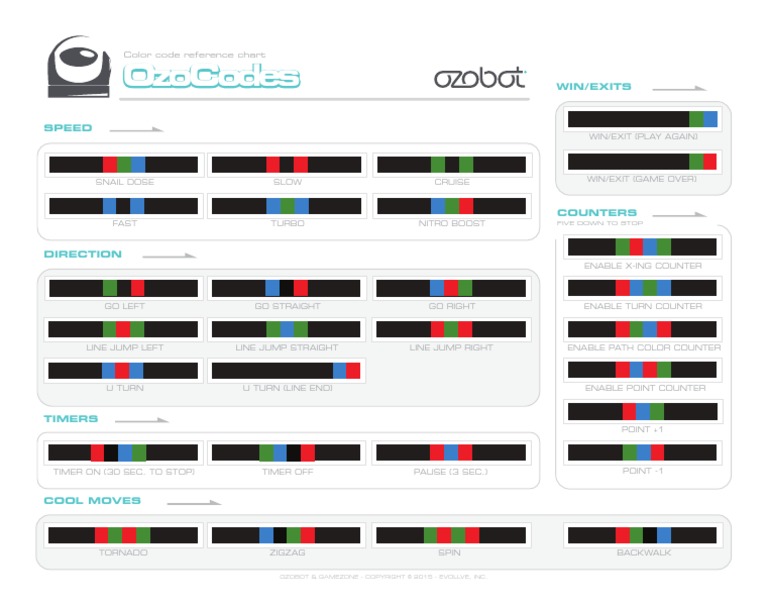
The Ozobot can follow lines on pre-printed sheets supplied with it, lines drawn on your tablet or drawn on paper using markers. The Ozobot is a bit more sophisticated than traditional line following robots in that it’s behavior (speed, turning, lights) can be modified while it is following the line by using combinations of green, red and blue bars in the line.
Pre-printed sheets
Several sheets supplied with the Ozobot contain example courses marked as black lines with colored sections and another sheet contains “Ozocodes”:
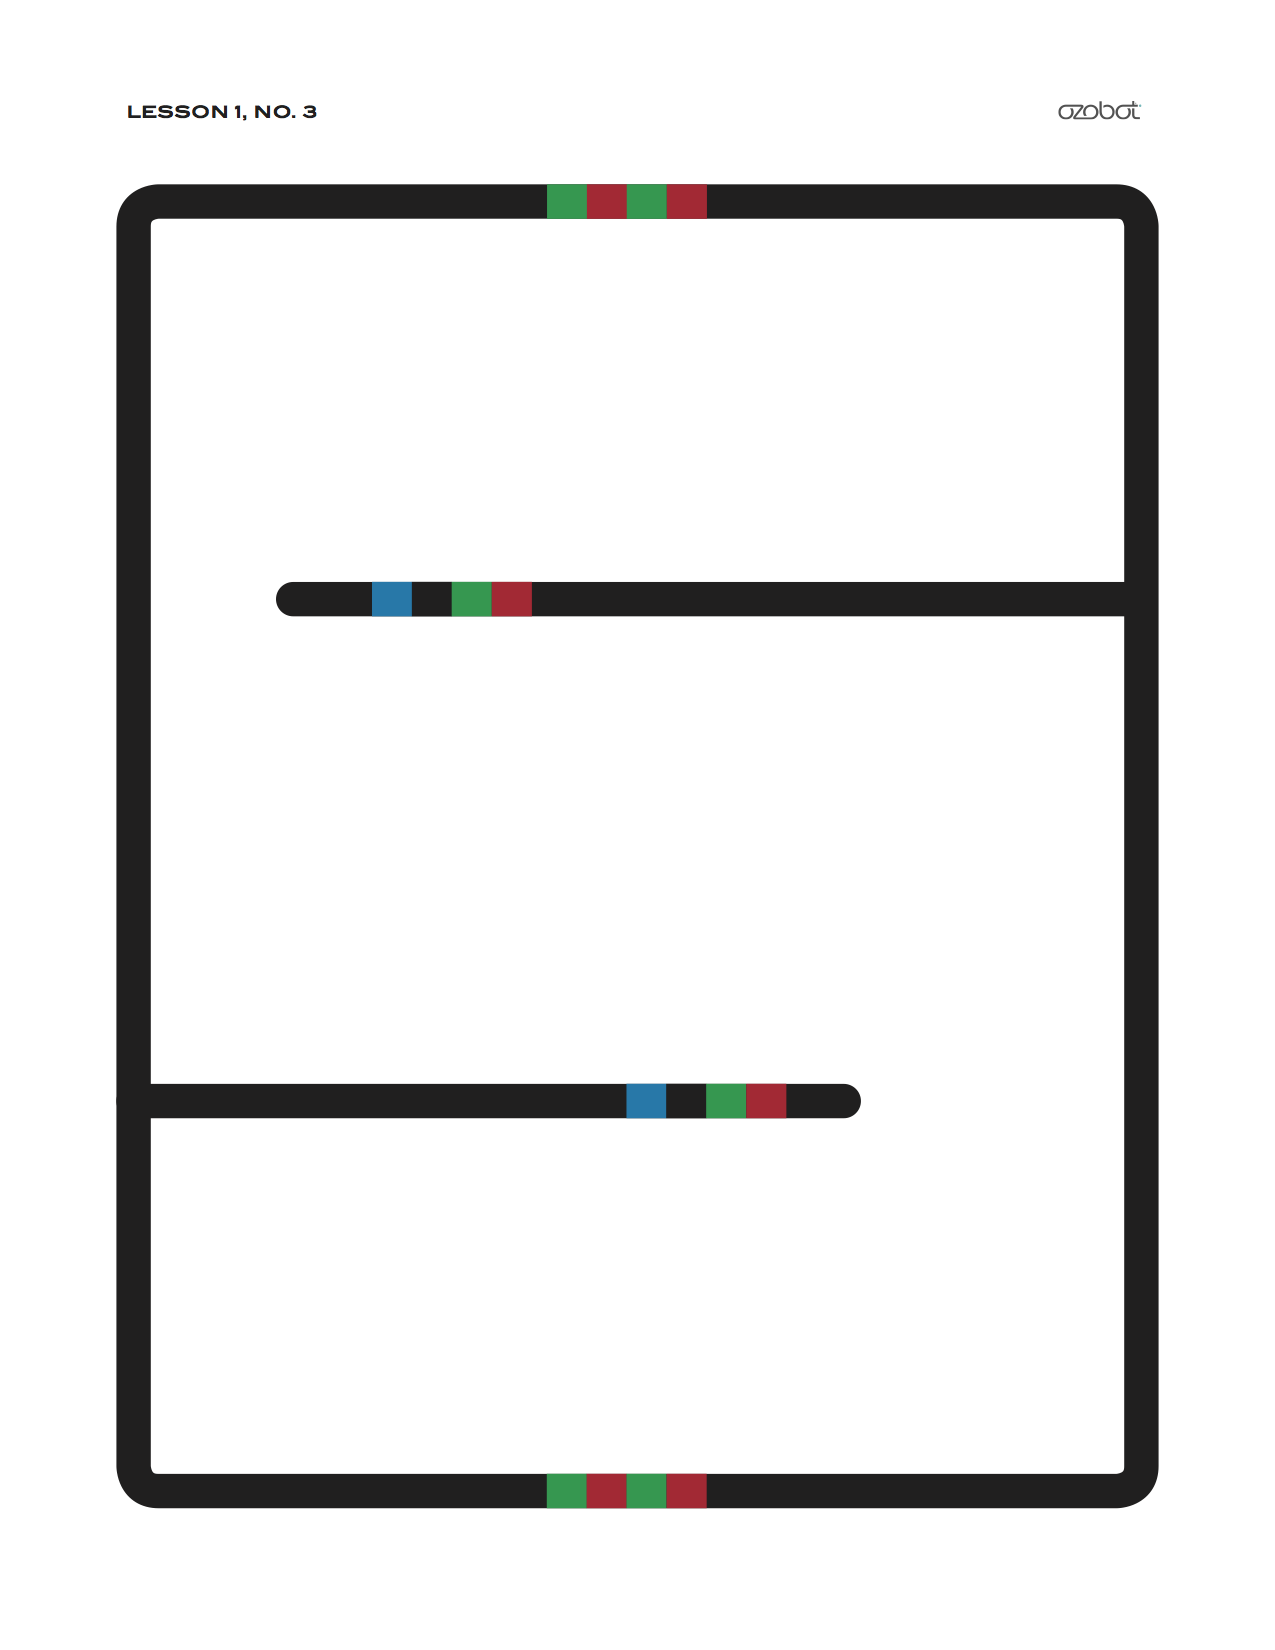
showing how a combination of green, red and blue sections marked on the black track can change the behavior of the Ozobot.
If you turn the Ozobot on and place it on one of the preprinted sheets it should follow the lines around. Note: you may find that covering the sheet with plastic to protect the sheet will interfere with the Ozobot’s ability to track the line or recognize the Ozocodes.
After playing with the printed sheet you can take the Ozobot markers and draw your own course on a blank sheet of paper, using the colored Ozocodes to control the Ozobot’s behavior. There are some lessons to get you up and going on the Ozobot user portal http://portal.ozobot.com/lessons. You can use markers other than the special Ozobot markers, though you need to have a fairly wide (preferably wedge) tip style marker and if it is running out of ink the Ozobot will probably have trouble following it. The color of the marker is somewhat critical – for example wide wedge tip black, red, green Sharpie markers worked fine, but the blue was too dark to be “recognized” as blue.
Using the Tablet
You can download the Ozobot app from the Apple App Store or Google Play to your tablet and then use one of the pre-made courses or draw your own onto the tablet. If you place the Ozobot on the course it should follow the lines. The app also contains some challenges whereby you have to get the Ozobot to do certain things by using the right Ozocodes to control it.
The app seems like a good idea but in practice there are some issues. It seems you have to get the display brightness just right to get the Ozobot to recognize the lines and codes. Another problem was that on my iPad the application is fairly unstable – it is slow to load, slow to respond and sometimes hangs or crashes. This was on an older iPad which may be a factor but other people report similar issues.
Programming the Ozobot
Besides being a line follower, the Ozobot can also be programmed to move through a fixed sequence of movements. There are a couple of different ways to do this.
“Dancing” Ozobot Using OzoGroove Tablet App
This is a simple way to use program Ozobot and is pretty limited in terms of what you can do but is probably suitable for children grades 1-3. Download the OzoGroove app from the Apple App Store or Google Play to your tablet then start the app. It will load up to a screen where you can select from a few different actions. Select “Dance” and after a while an image of a dance floor will appear. You can select a dance and then place press and hold the button on the Ozobot until it flashes white (to put it in programing mode) then place it on a position on the “dance floor” to program it. It will then dance. You can even create your own dance and program it into the device.
Unfortunately on my iPad the application is very unstable – it is very slow to load, extremely slow to respond and frequently hangs or crashes. This was on an older iPad which may be a factor but other people report the same issue.
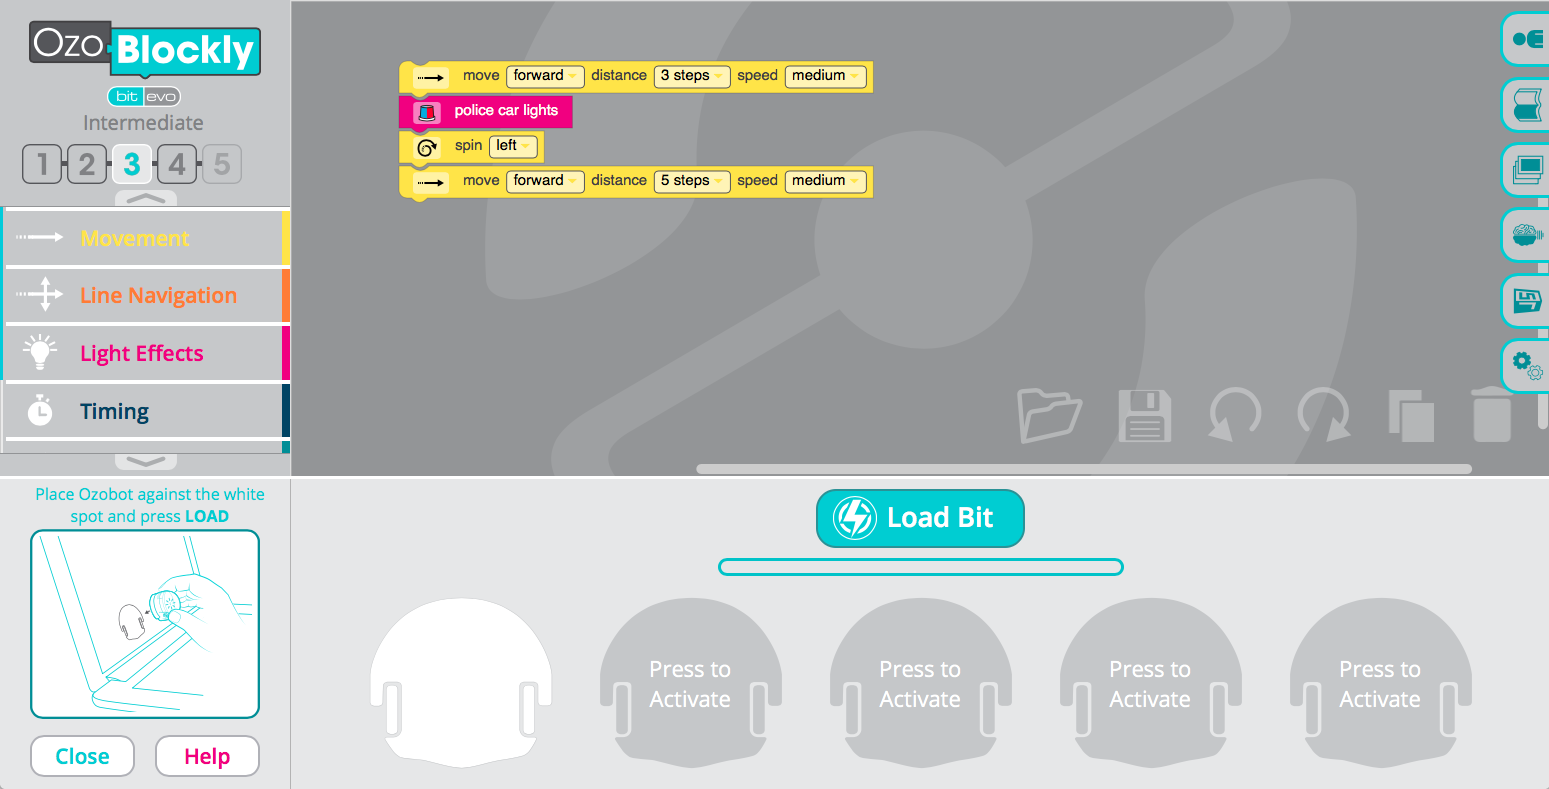
Blockly Programming
The Ozobot can also be programmed using a “drag and drop” user interface by pointing your browser at https://ozoblockly.com and creating a program using blocks that you drag around, much like Scratch:
NOTE: the following may now be out of date and programming the Ozobot can be done wirelessly instead.
Once you have the program the way you want, you upload it to the Ozobot by holding it against the white image of the Ozobot on the screen and the program is transferred in a series of flashing colors to the robot. This process is a little tricky as the steps have to be followed exactly as shown in this video:
This is significantly more challenging than drawing lines on paper (and hence more suited to children grades 3-6), but is much closer to ‘real’ programming and allows much more flexibility in controlling the robot. For example Ozoblocky could be used to program the Ozobot to complete some kind of obstacle course.